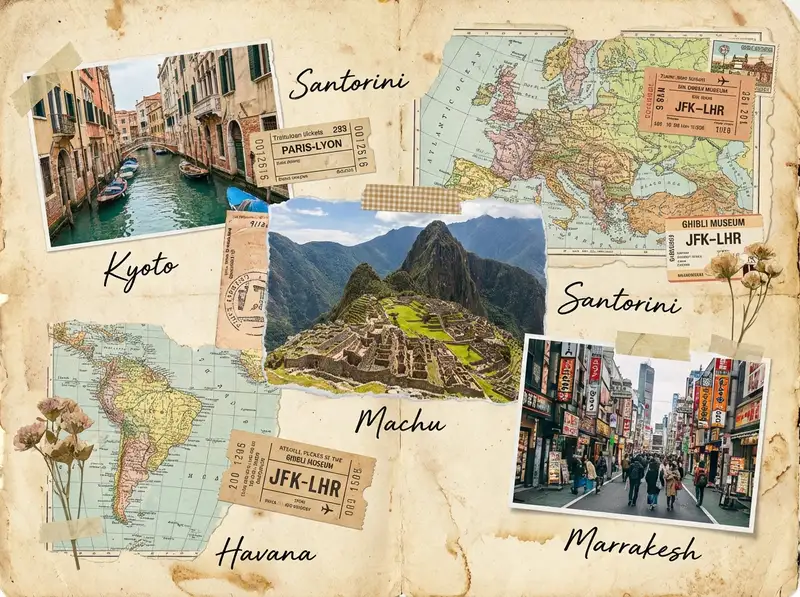
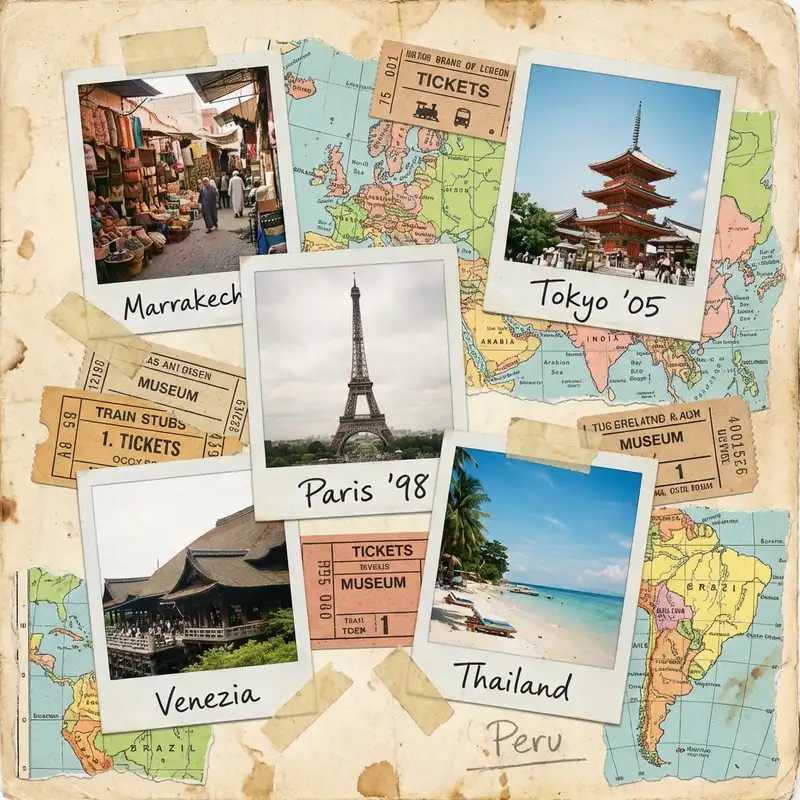
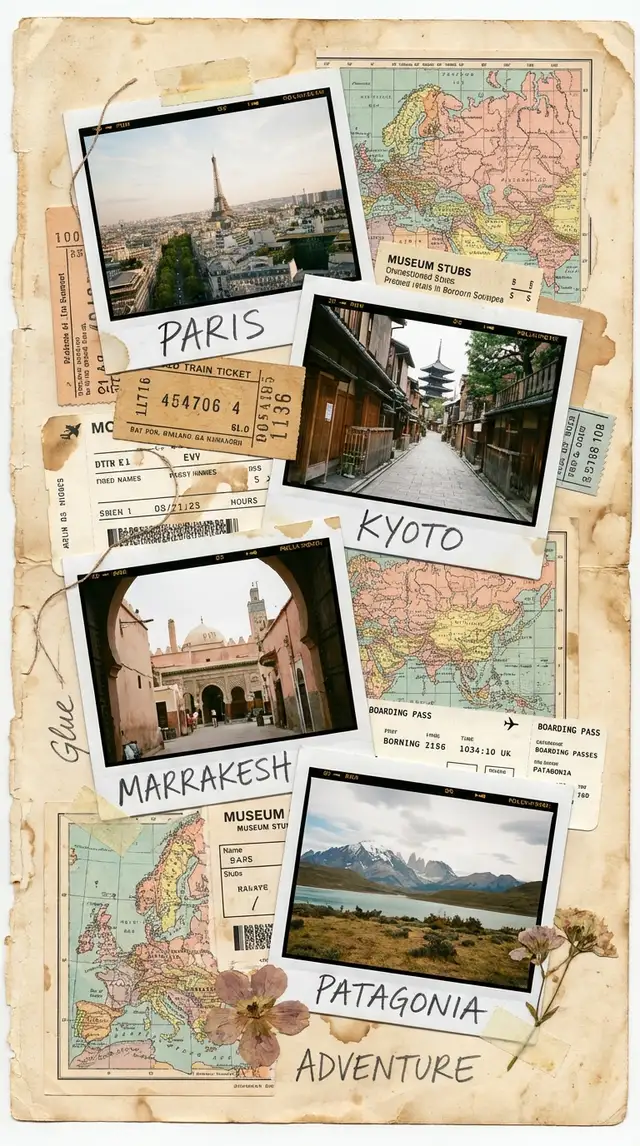
Travel Photo Collage
Every trip has a rhythm -- the golden hours, the wrong turns, the meals you still think about -- and a collage is the only format honest enough to hold all of it at once.
Ingredients
- 5-10 travel photos covering the full arc of your trip (landmarks, food, street scenes, candid moments, golden hour landscapes)
- Screenshots or photos of ticket stubs, boarding passes, menus, or maps
- Stickers from the Sticker Library -- stamps, postmarks, arrows, travel-themed ephemera, washi tape
- A handwritten or typewriter-style font for destination names and dates
- A warm, textured background -- aged paper, kraft, or sandy linen
- Optional: a map screenshot of your route, a selfie you almost deleted, a photo of something only you would notice
Steps
-
Open Freestyle and dump everything in
Tap Freestyle for a blank canvas. This is a travel dump, not a grid -- you want the feeling of spreading photos across a table after a trip. Import 5-10 photos without overthinking. Include the postcard shots and the weird ones: the stray cat, the street sign you found funny, the plate of food that changed your standards forever.
-
Build the landscape in layers
Place your strongest landscape or establishing shot large, slightly off-center. Layer smaller photos on top and around it, overlapping edges by a quarter or so. Rotate a few photos two or three degrees. Group food shots together, stack candid moments near each other. The arrangement should read like a story: arrival at top-left, the middle of the trip in the center, the journey home toward the bottom-right.
-
Tear up the edges
Open the Sticker Library and search for torn paper, ripped edges, or vintage frames. Layer torn paper strips under and between photos so it looks like they are sitting on scraps of a journal page. If you have a screenshot of a map, shrink it down and tuck it behind a cluster of photos so just the edges peek out. This texture is what separates a travel collage from a photo grid.
-
Add the ephemera
Import photos of your ticket stubs, boarding passes, or receipts. Shrink them small and tuck them into gaps between photos. Search the Sticker Library for postage stamps, postmarks, airmail stripes, and compass roses. Scatter these lightly -- they should feel discovered, not placed. Use Magic Cutout on a food photo or a detail shot to turn it into a floating sticker you can layer over other elements.
-
Write the names that matter
Tap Text and type the city or country name in a handwritten font. Place it at an angle across the collage, large enough to read but not so large it competes with the photos. Add smaller text for dates, flight numbers, or a short phrase that captures the trip -- "lost three times, found everything." Use the Doodle Tool to draw arrows between locations or to underline a caption.
-
Set the background to aged paper
Swipe to Backgrounds and choose a warm kraft paper, sandy beige, or aged linen texture. The background should feel like the inside cover of a well-traveled journal. Avoid white -- it kills the mood. If the texture feels too flat, layer a large faded sticker or watercolor wash from the Sticker Library behind everything.
-
Final pass and save
Zoom out and look at the whole composition. Fill any dead space with a tiny sticker, a doodle, or a small photo you almost left out. Check that the eye moves naturally across the collage without getting stuck. Save at full resolution. Export as landscape for printing, or crop a square version for Instagram. For a reel or story, use Animation to reveal photos one by one like flipping through a travel journal.
Variations
Vintage Postcard Version
Apply a warm sepia filter to all photos using Photo Editing. Use only typewriter-style fonts and vintage postage stickers. Add a handwritten "Wish you were here" in the corner. Print on matte card stock for an actual postcard you can send.
Photo Dump for Social
Skip the ephemera and focus on a tight cluster of 6-8 photos with minimal overlap. Add one bold text label with the destination name. Export as a square carousel -- each slide a different crop of the same collage. Let the algorithm do the rest.
Trip Timeline
Arrange photos in a strict left-to-right timeline with dates beneath each cluster. Connect them with a hand-drawn line using the Doodle Tool. This version works beautifully printed as a panoramic strip for a shelf or desk.
Tips
- The photos you almost deleted -- the blurry street scene, the accidental shot of your shoes -- often carry more atmosphere than the perfect landmark photo
- Warm up all your photos slightly in Photo Editing so different lighting conditions and cameras feel unified
- Kraft paper backgrounds (#C4A882 range) make every travel photo feel like it belongs in the same journal
- Save as PNG if you plan to print -- the torn paper textures and overlapping layers need lossless compression to stay sharp
You might also like

Aesthetic Photo Dump Collage
Dump the photos, keep the feeling -- the whole point is that it looks like you did not try, even though you absolutely did.

Aesthetic Mood Board Collage
You already know the feeling you want -- now give it a shape.

Baby's First Year Photo Collage
Twelve months fit in your arms for such a short time, but they can live on a single page forever.

Best Friend Photo Collage Gift
The friendship recap nobody asked for but everyone cries over -- from the first terrible selfie to last weekend's proof that nothing has changed.